Photography Tutorial
Panoramas and Photomerge

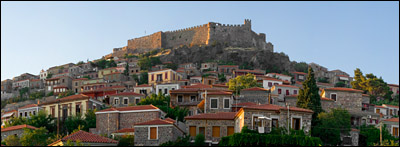
Picture 1. A panorama photo of the medieval castle of Molyvos (Lesbos, Greece) that is created with Photomerge.
03.08.2007 Category: Photography
By taking multiple photos and stitching them into one panorama photo one can create photos with an exceptionally high resolution and wide view. The high resolution makes it possible to create large high quality prints. Here I discuss how to create a horizontal one row panorama picture.
A panorama photo is created by taking multiple adjacent photos and using a digital image processing software to stitch them into one photo. I don't discuss here manual stitching because the stitching can nowadays be done automatically with an appropriate software. The stitching of photos is an easy task for example with Photshop's Photomerge tool which stitches photos seamlessly and automatically. Photos can be stitched automatically if they have been taken with care and certain things have been taken into account. Here is my list of things that are worth noticing when photographing panoramas.
- Don't change the exposure between the photos
- Don't change the focus between the photos
- Don't change the focal length between the photos
- Don't change the white balance between the photos
- Take photos so that they partly overlap
- Use a tripod
- Photograph fast enough
- Save photos into a raw format
- Choose the right: Landscape or portrait?
- Photoshop Photomerge
Exposure
Choose carefully the right exposure for the panorama. Remember that the darkest and lightest spot of the panorama view isn't often in the same photo. Take some test photographs of different parts of the view to find the optimal exposure. Use the same exposure in each photo. In practice it means that you have to use manual settings in the camera so that the shutter speed, aperture and ISO sensitivity are the same in each photo.
Focus
Keep the focus the same in each photo. It's best to use the manual focus. If there is no manual focus in the camera, take that into account and use other means to ensure that the focusing distance stays the same in each photo.
Focal Length
Keep the focal length the same in each photo. Don't use zoom or change lens between photos.
White Balance
Remember to keep the white balance the same in each photo. In practice it means that you turn off automatic settings of the camera and set the white balance manually.
Take Overlapping Photos

Picture 2. Three partly overlapping photos of the town of Molyvos. In this example photos are overlapping less than 25% and Photomerge still stitches them. However, I don't recommend to try this, but to take photos so that they overlap at least 25%.
Take photos so that they partly overlap with each other. I recommend that photos should overlap at least 25%. Photoshop's Photomerge requires that photos overlap 25% - 40%. If you have too little overlapping, the photos can't be stitched seamlessly and if you have too much overlapping, you have to take very many photos to create a wide panorama.
Use a Tripod
A tripod is a very useful tool when taking photos to create a panorama. With a tripod you can guarantee that photos are precisely next to each other and that the camera stays in the same location. Before taking the photos pan the camera and check that it is on level so that the horizon stays in the same place in each photo. If there is a bubble-spirit glass in the tripod or camera head, you can use that. It's good if the camera head is a three-way head where each axis is separately controlled by an individual lock. I used Manfrotto 460MG camera head when taking the example photo of this article. (There are special camera heads for panorama photography where the camera can be placed so that it turns around the optical center of the lens. This way you can avoid parallax error and get more accurate results. This kind of equipment is especially needed when there is the same close by subject in several photos.)
Photograph Fast Enough
If the sun is setting or rising, you should hurry because the lighting changes rapidly. Clouds can also move and change very quickly.
RAW
Save photos into a raw format. The raw format gives you flexible processing possibilities. With the raw format you can for example adjust the exposure and white balance afterwards.
Landscape or Portrait
Think carefully whether you should take the photos in landscape or portrait orientation. Vertical photos give you more vertical resolution but you have to take more photos than if you would take horizontal photos.
Photohop Photomerge
Adobe Photoshop's Photomerge (File > Automate > Photomerge...) is one tool which can be used to stitch photos into a panorama seamlessly and automatically if the photos have been taken with care. Photomerge requires that the photos overlap 25% - 40%. Photomerge offers several different methods for creating a panorama. Let's mention, as an example, Cylinderical method which is well suited for creating wide panoramas.
Example of a panorama photo created with Photoshop Photomerge

Picture 3. Eight adjacent and partly overlapping vertical photos of the castle of Molyvos. Photos have been taken with care so that they can be seamlessly stitched into a panorama photo with Photoshop's Photomerge tool.

Picture 4. The final photo of the castle of Molyvos. The final panorama made in Photomerge is seamless. The photo has been cropped in order to enhance the composition.